
Learn How to Play Cornhole
HOW TO MAKE
CORNHOLE BOARDS
Build your own cornhole boards with this step-by-step DIY guide covering materials, measurements, cutting plans, assembly, and finishing.
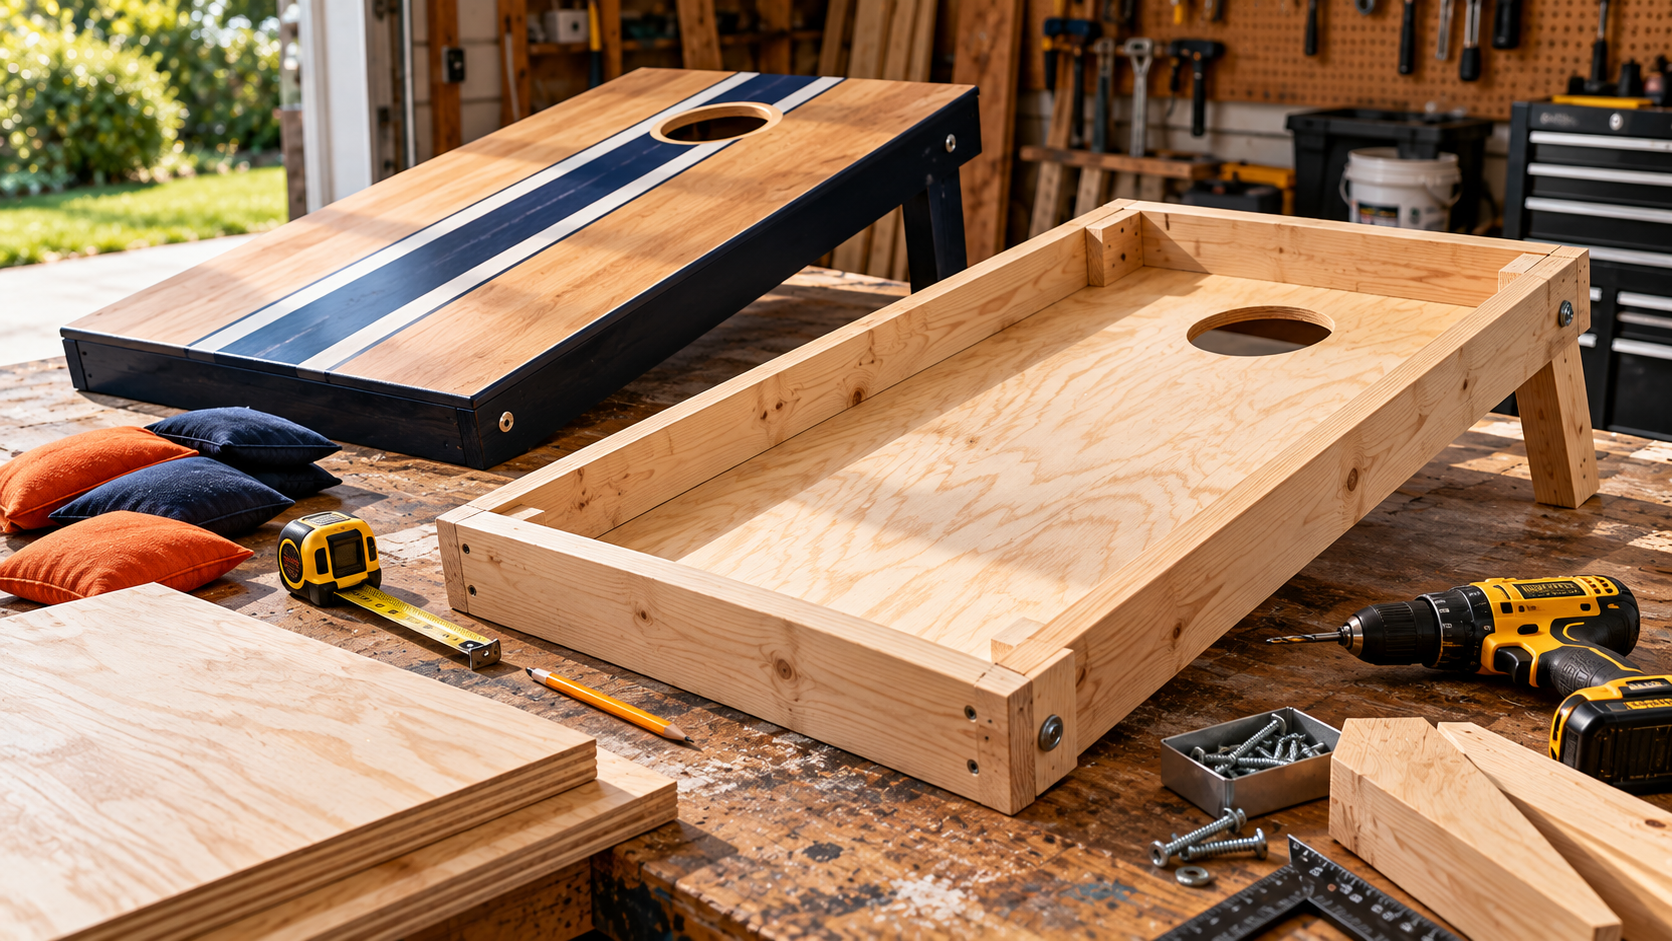
Learning how to make cornhole boards is a practical woodworking project for anyone who enjoys backyard games, tailgating, or building things themselves. Instead of purchasing a completed set, you can construct your own boards using plywood, lumber, and a few common tools. The process also gives you the freedom to choose your own colors, finishes, and designs.
A typical DIY cornhole board consists of a wooden frame, a flat playing surface, a circular hole, and folding support legs. While the design is relatively simple, getting the measurements right is important. Proper dimensions help ensure that bags land and slide consistently during gameplay. This guide explains how to build a pair of regulation-size cornhole boards, from preparing the materials to applying the final finish.
WHAT MATERIALS DO YOU NEED TO MAKE CORNHOLE BOARDS?
Before starting your project, gather the lumber, hardware, and tools needed to assemble both boards. Using straight, undamaged wood makes it easier to build a level playing surface and avoid problems when attaching the frame.
For this design, use 3/4-inch hardwood plywood for the playing surfaces. This provides a sturdy top suitable for a durable homemade set. The frames and folding legs can be made from standard 2×4 lumber.
Materials for Two Cornhole Boards
- Two pieces of 3/4-inch hardwood plywood, each measuring 24 by 48 inches
- Four straight 2×4 boards, approximately 8 feet long
- Wood screws suitable for assembling the frames and securing the plywood
- Four carriage bolts with matching washers and nuts for the folding legs
- Wood glue and paintable wood filler
- Sandpaper in medium and fine grits
- Primer, paint, stain, or a compatible protective clear finish
Tools You Will Need
- Measuring tape and pencil
- Circular saw or miter saw
- Drill and screwdriver bits
- Jigsaw or 6-inch hole saw
- Clamps and a carpenter’s square
- Orbital sander or sanding block
- Safety glasses, hearing protection, and dust protection
If you do not own a saw capable of cutting large plywood sheets, many home improvement stores offer basic cutting services. Having the playing surfaces cut to size before beginning can make the project more manageable.
UNDERSTANDING CORNHOLE BOARD DIMENSIONS
Before cutting any lumber, familiarize yourself with the standard cornhole board measurements. Regulation-size boards have a playing surface that is 48 inches long and 24 inches wide. Each board contains a 6-inch-diameter hole positioned near the raised end.
| Component | Measurement |
|---|---|
| Board length | 48 inches |
| Board width | 24 inches |
| Hole diameter | 6 inches |
| Hole center from back edge | 9 inches |
| Hole center from either side | 12 inches |
| Front playing-surface height | 3–4 inches |
| Rear playing-surface height | 12 inches |
The hole should be centered horizontally, leaving 12 inches between its center and either side of the board. Measure 9 inches down from the raised back edge to locate the hole’s center.
These measurements are important when building boards for consistent practice or competitive use. You can also read our guide explaining how far apart cornhole boards should be once your project is complete.
HOW TO BUILD CORNHOLE BOARDS STEP BY STEP
With your materials prepared, you can begin constructing the boards. The following steps use a straightforward rectangular frame with folding legs. Complete each stage for both boards to keep their dimensions consistent.
Step 1: Cut the Wood to Size
Start by cutting the plywood into two panels, each measuring 24 by 48 inches. These pieces will form the playing surfaces. Next, prepare the 2×4 lumber for the frames and legs.
| Piece | Quantity for Pair | Cut Length |
|---|---|---|
| Long frame rails | 4 | 48 inches |
| Short frame rails | 4 | 21 inches |
| Folding leg blanks | 4 | Approximately 12 inches, trim to fit |
The shorter frame rails fit between the longer pieces. Since a standard 2×4 is approximately 1.5 inches thick, the 21-inch rails create a finished frame width of 24 inches.
Step 2: Assemble the Wooden Frames
Arrange two 48-inch rails and two 21-inch rails into a rectangle, placing the shorter pieces between the longer sides. Check the corners with a carpenter’s square before fastening the wood together.
Drill pilot holes to reduce the chance of splitting the lumber. Apply wood glue to the joints and secure the frame with appropriate wood screws. Repeat the process to create the second frame. Make sure both frames sit flat and measure the same from corner to corner.
Step 3: Attach the Plywood Playing Surface
Place a plywood panel over the completed frame and align its edges with the outer edges of the lumber. Apply wood glue along the top of the frame before fastening the plywood into position.
Drill pilot holes and countersink the screws so the heads sit slightly below the playing surface. Raised screw heads can interfere with sliding bags and create an uneven finish. Repeat this step for the second board.
Step 4: Measure and Cut the Cornhole Hole
To locate the hole, measure 12 inches from either side of the plywood and 9 inches down from the back edge. Mark the intersection as the center point of the hole.
Use a compass to draw a circle with a 3-inch radius, creating a 6-inch diameter opening. If using a jigsaw, drill a starter hole inside the circle, then carefully follow the marked line. A 6-inch hole saw is another option for cutting the opening.
Sand the inside edge of the hole after cutting. Removing rough wood and splinters helps protect the bags and gives the finished board a cleaner appearance.
Step 5: Build and Attach the Folding Legs
Folding legs allow the cornhole boards to sit at the proper angle during play and make them easier to store. Begin with four approximately 12-inch leg blanks cut from 2×4 lumber.
Round one end of each leg to create clearance for rotation. Drill a centered pivot hole near the rounded end, then position the legs inside the upper corners of the frames. Mark and drill matching holes through the frame sides.
Attach the legs using carriage bolts, washers, and nuts. Avoid tightening the hardware so much that the legs cannot fold. With the boards standing on a level surface, measure the rear playing-surface height and trim or angle the feet as necessary until each board reaches 12 inches.
Building tip: Do not rely on a universal finished leg length. The correct length depends on the pivot position, plywood thickness, and angle of the legs. Test-fit them before making the final cuts.
HOW TO SAND, PAINT, AND FINISH CORNHOLE BOARDS
Once both boards are assembled, the final step is preparing the playing surfaces. A smooth finish makes the boards more comfortable to handle and helps cornhole bags move predictably when they land.
Start by filling any recessed screw holes with wood filler. After it dries, sand the plywood, frame edges, and hole openings until they feel smooth. Remove all sanding dust before applying primer, paint, or stain.
You can leave the boards with a natural wood appearance or decorate them with stripes, team colors, or custom designs. If painting, allow each coat to dry according to the manufacturer’s instructions. Apply a compatible protective finish if needed, especially if the boards will be used outdoors.
The finished surface should be smooth enough for bags to slide but not so slippery that they immediately slide back down the board. Test the boards with a few throws after the coating has fully cured. Keep the boards dry and store them indoors when not in use to reduce moisture damage.
TIPS FOR MAKING BETTER DIY CORNHOLE BOARDS
Small construction details can make a noticeable difference in how your homemade cornhole boards perform. Taking additional time during assembly can help prevent uneven surfaces, loose hardware, and inconsistent board angles.
- Choose straight lumber and flat plywood to reduce twisting and warping.
- Measure both boards independently before making permanent cuts.
- Countersink screws and fill their holes before painting.
- Check that the folding legs open smoothly and support the boards evenly.
- Sand every exposed edge, including the inside of the scoring hole.
- Allow the finish to cure fully before playing.
If you plan to use the boards frequently for competitive practice, pay particular attention to the playing surface. A sturdier top with minimal flex helps bags respond more consistently after impact. Tournament organizations may also require specific construction standards, so check their current equipment rules before entering events.
GET YOUR HOMEMADE CORNHOLE BOARDS READY TO PLAY
Building your own cornhole boards is a manageable project that combines basic woodworking with a game you can enjoy for years. By following the correct measurements, assembling a stable frame, and finishing the surface carefully, you can create a personalized set for your backyard, garage, or next outdoor gathering.
Once your DIY cornhole boards are finished, position them 27 feet apart from front edge to front edge for regulation adult play. Add two sets of four cornhole bags, make sure the playing area is clear, and you’re ready to begin.
If you’re still learning the game, check out our complete guide on how to play cornhole for an introduction to scoring, throwing techniques, and basic rules.