How to Make Cornhole Boards: Step-by-Step DIY Guide
Cornhole is a beloved game that has brought friends and families together in backyards, tailgate parties, and friendly competitions across the country. While you can easily buy a set of cornhole boards, making your own adds a personal touch and allows for full customization. This guide will walk you through the entire process of building high-quality cornhole boards from scratch, including material selection, assembly, and finishing touches.
Materials and Tools You’ll Need
Before diving into the project, make sure you have all the necessary materials and tools on hand. Here’s what you’ll need to build your own set of cornhole boards:
- Two sheets of 1/2-inch or 3/4-inch plywood (each 2 feet by 4 feet) for the board surfaces
- Four 2×4 pieces of wood (8 feet long, for the frames)
- Wood screws (2.5 inches long)
- Wood glue
- Measuring tape
- Saw (a circular saw or miter saw works best)
- Power drill with a 6-inch hole saw attachment for the cornhole hole
- Sandpaper (120 and 220 grit for a smooth finish)
- Paint or stain for decoration
- Paintbrushes or a paint roller
- Wood filler (optional, for smoothing out imperfections)
Having everything ready before you start will make the project much smoother and more enjoyable.
Step 1: Preparing the Plywood for the Boards
The first step in building your cornhole boards is to cut your plywood. Each piece should measure 2 feet by 4 feet. If you haven’t purchased pre-cut plywood, use a saw to cut it to size. These pieces will serve as the surfaces where the bean bags land.
Make sure the plywood is of good quality, as this will affect the durability and smoothness of your boards. A sturdy, high-quality sheet of plywood will ensure a flat, even playing surface.
Step 2: Building the Frame
Next, you’ll construct a sturdy frame to support your plywood surface. Here’s how to do it:
- Cut your 2×4 wood pieces into four lengths of 48 inches and four lengths of 21 inches.
- Lay out the 48-inch pieces parallel to each other, and use the 21-inch pieces to connect them, forming a rectangular frame.
- Use wood glue and wood screws to secure the frame pieces together. Make sure everything is square and level before tightening the screws.
This frame will give your cornhole board the strength and durability it needs to withstand frequent use.
Step 3: Attaching the Plywood to the Frame
Now that your frame is complete, it’s time to attach the plywood to the top. Place one piece of plywood on each frame, making sure it is perfectly aligned with the edges. Use wood screws to secure the plywood to the frame, placing screws about every 6-8 inches along the perimeter.
This step ensures that the board surface is firmly attached and won’t separate from the frame during play.
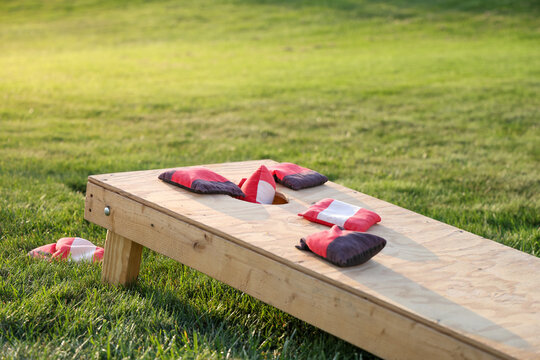
Step 4: Creating the Cornhole Hole
The cornhole hole is what makes the game, well, cornhole! Here’s how to accurately cut the hole in each board:
- Measure 9 inches from the top edge of the board and mark the center point. The hole should be centered horizontally, 12 inches from each side.
- Use a compass or a round object to outline a 6-inch circle around this point.
- Attach a 6-inch hole saw to your power drill and carefully cut out the circle. If you don’t have a hole saw, drill a pilot hole and use a jigsaw to cut along the outline.
Take your time with this step to ensure a smooth, clean cut, as it will impact the performance of the game.
Step 5: Sanding the Boards for Smoothness
Sanding is a crucial step to ensure the safety and performance of your cornhole boards. Start with 120-grit sandpaper to smooth out rough edges and any splinters. Once the surface feels even, switch to 220-grit sandpaper for a polished finish. Pay special attention to the edges of the hole, making sure they are rounded and splinter-free.
A well-sanded board not only looks better but also provides a smooth surface for bean bags to slide across.
Step 6: Installing the Legs
The legs of your cornhole boards are what allow them to stand at the correct angle. Here’s how to make and attach them:
- Cut four 2×4 pieces, each 12 inches long, for the legs.
- Round off one end of each leg to ensure they fold smoothly. This can be done with a jigsaw or by sanding.
- Drill a hole through the rounded end of each leg, about 1.5 inches from the top. Attach the legs to the inside corners of the frame using carriage bolts, washers, and nuts. The legs should be able to fold in and out easily.
- Adjust the legs so that the back of the board is 12 inches off the ground when extended, creating the correct playing angle.
Make sure the legs are sturdy and allow the board to sit firmly on the ground without wobbling.
Step 7: Painting or Staining Your Boards
Now comes the creative part decorating your boards! You can choose to paint them in your favorite team colors, add fun designs, or stain them for a natural wood look. Here are some tips for finishing:
- If you’re painting, start with a coat of primer and let it dry completely.
- Use outdoor paint or wood stain to protect the boards from the elements.
- Apply a clear polyurethane finish to seal the surface and add durability.
Make sure to let the paint or stain dry thoroughly before playing your first game. This will ensure the surface is smooth and resistant to wear.
Tips for a Professional Finish
For a polished, professional look, consider these finishing tips:
- Use Wood Filler: Fill in any gaps or imperfections in the wood before sanding for a seamless surface.
- Add Handles: If you plan on transporting your boards frequently, consider adding handles to the sides for easy carrying.
- Non-Slip Pads: Attach non-slip pads to the bottom of the legs to keep the boards from sliding during play.
These small details can make a big difference in the quality and usability of your DIY cornhole boards.
Bringing It All Together: Your Custom Cornhole Boards Are Ready for Play
Making your own cornhole boards is a fun and rewarding project that enhances your enjoyment of this classic game. With just a few materials and some basic woodworking skills, you can create a custom set that will be the highlight of any gathering. Whether you choose to paint them with bold designs or keep a natural finish, your handmade boards are sure to impress.
For more tips on cornhole or to learn how to elevate your game, visit CornholeFun.com. Our site is packed with resources to help you perfect your skills and enjoy endless fun with friends and family!